In this tutorial we will show you how to set up L2TP VPN on Windows 8 but first let’s see what are our requirements and recommendations.
Requirements
In order to set up the L2TP VPN you will need:
- A RayaVPN account. If you don’t have one you can try our services now.
- Your VPN username, password and VPN server address. You can find them in your account on our website, by going to your package.
If you want to set up L2TP VPN manually, go step-by-step through following instructions:
L2TP VPN Setup Instructions
- Click on “Open Network and Sharing Center” from the network icon from the taskbar (1) or click on “Network and Sharing center” from Control Panel.

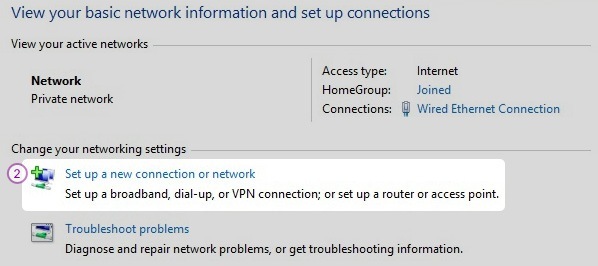
- Click on “Set up a new connection or network” (2).

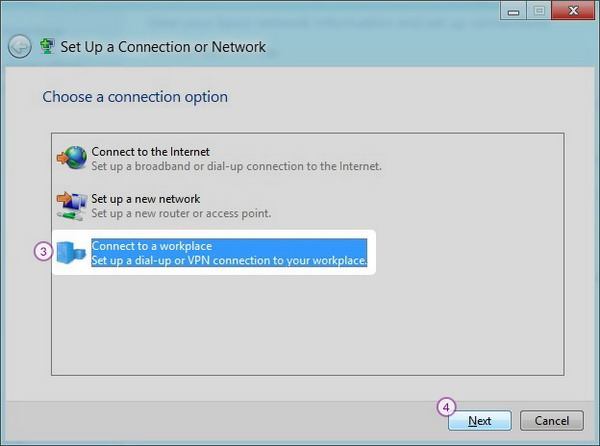
- Select “Connect to a workplace” (3) and click “Next” (4).

- Choose “Use my Internet Connection (VPN)” (5).

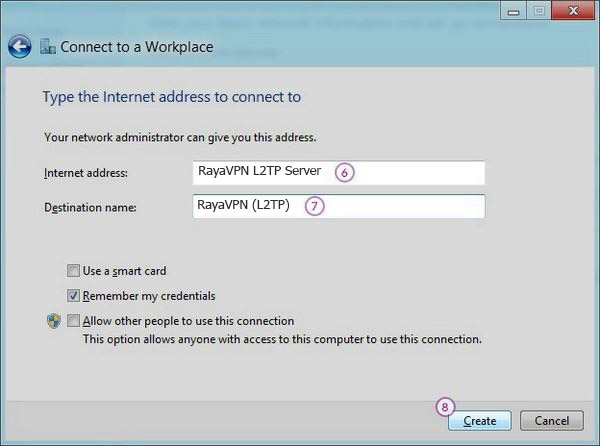
- In the “Internet Address” (6) field type IP address of the RayaVPN server you want to connect to. You can find all the available servers in the package details in your account. In the “Destination name” field (7) type “RayaVPN (L2TP)”.
Click “Create” (8).
- Click on the monitor icon (9) on the bottom right-hand corner.

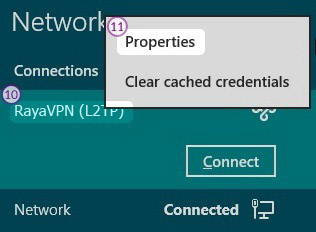
- Right–click on the “RayaVPN (L2TP)” connection (10), and choose “Properties” (11) from the menu.

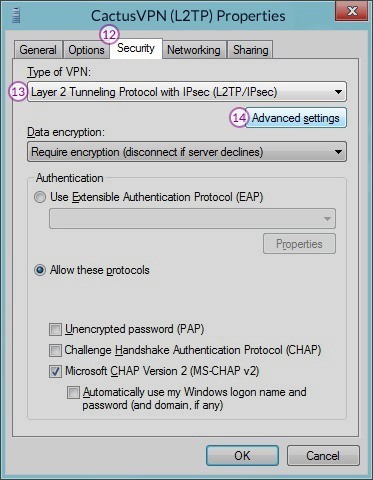
- Select “Security” tab (12) and for “Type of VPN” select “Layer 2 Tunneling Protocol with IPsec (L2TP/IPsec)” (13).Click on “Advanced Settings” (14).

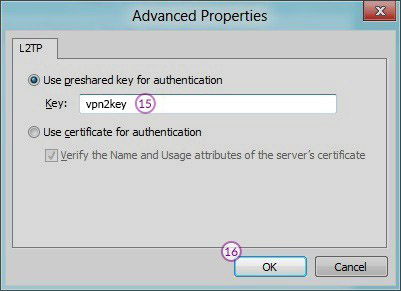
- Enter preshared key: “123456” (15) and click “OK” (16) for both windows.

- Click again on the monitor icon on the bottom right-hand corner, and click “Connect” (17) to “RayaVPN (L2TP)”.

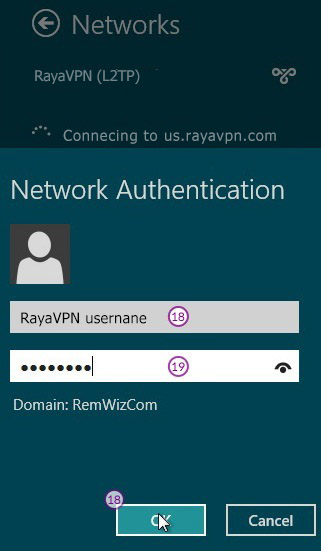
- In the next fields type your VPN username (18) and password (19) and click “OK” (20). You can find them in your account on our website, by going to your package. Make sure you use your VPN username and password and NOT the website account credentials (What is the difference?).

- When next to “RayaVPN (L2TP)” is written “Connected” (21) your connection has been created.


